[Tools] BERNINA Embroidery Software 9 사용법_Creator와 DesignerPlus 차이점
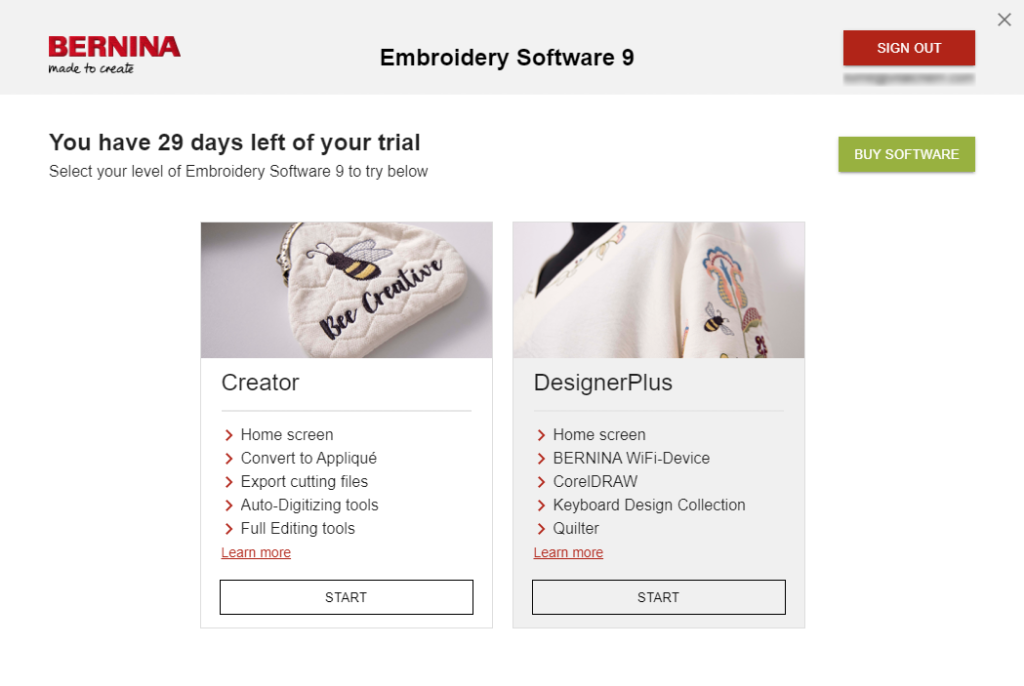
BERNINA Embroidery Software 9를 실행하면 아래 이미지와 같이 Creator와 DesignerPlus의 Product Level로 실행할 수 있습니다.
- Creator:
BERNINA V9 중급 제품을 자수 수정 및 디지털화 기능을 제공합니다. - DesingerPlus:
완전한 디지털화 기능. 이 모델은 CorelDRAW Graphics를 표준으로 통합하고, Cross Stitch와 Quilter 애플리케이션도 통합합니다.
유튜브 “Bernina Designer Plus vs Bernina Creator software“를 보시면 두 Product Level 사이의 차이점을 자세하게 알 수 있습니다.
Okay, so I’ll just bring that down a little bit. Here is your top toolbar here for Designer Plus, and here it is for the Creator level here in the lower one. I’ve taken a picture. Now, at first glance, they look almost identical, so there’s not a lot of difference between the top toolbar. You’ve got the same file, edit, view, design, arrange, artwork, settings, window, and help in your top menu. Then, if we start at the top left, you’ve got your home button that’s available in both the Creator and the Designer Plus, and that will take you back to the homepage that is what opens first of all when you open your software. There you can access, if you’re online, you can access tutorials from Bernina and all sorts of other information, so it’s a quick shortcut back there.
The next icon, I’m not really sure whether this is in the Creator level software, this artwork canvas icon. I have got the dealer version, which has both versions, Designer Plus and Creator, packaged together so that I can use both of them for teaching purposes, so thank you very much, Bernina Australia, for that. Now, this icon here is to, in Designer Plus, it takes you to the artwork canvas, which is basically the CorelDRAW that comes with Designer Plus embedded into the software in its own user interface so that you can create drawings there. You can open the CorelDRAW standalone as well that comes with it. You don’t get the CorelDRAW with Creator, the Creator level. As I said, I’m not sure if that icon should be there. The next icon is your embroidery canvas icon, and this is what I’ve got open for Designer Plus, the embroidery canvas, so that’s where that will take you. The third one is the embroidery library, and that is the same in both Creator level and Designer Plus level.
If you’ve got a graphic, you can convert it. Sorry, if you’ve got a design, there’s a convert button here to convert it to a graphic, and again, I don’t think that should be there in the Creator level because you don’t have the artwork canvas to convert a design back to a graphic. Then, as we come along, we’ve got “New,” so you can open a new design, you can open an existing design by navigating to the folder, you can open recent designs, you can save, you can print, you can do a print preview of what will be printed, the information about the design, you can send to your machine, and you can send to via Wi-Fi.
So this “Send to Your Machine” has always been there in all the previous versions, and it basically allows you to send the design directly to your USB stick, or if you have your machine connected to your computer, you can send it via cable to the machine, and there’s a couple of other options for older machines, cards, etc. The next one is the Wi-Fi icon, and that doesn’t come standard with the Creator level. It comes standard with the Designer Plus level. You have to purchase the Wi-Fi device separately that allows you to send a design from your computer wirelessly to your machine, providing your machine is turned on and it’s connected via the Wi-Fi app that comes with us with the Designer Plus software, and I presume would come with the Wi-Fi attachment if you bought it separately for the Creator Plus. So you can buy that Wi-Fi attachment if you so desire, and that’s why that button’s there. Then you’ve got “Cut,” “Copy,” and “Paste,” which is the same, “Undo,” “Redo.”
Here you can insert a design, which is a little bit different than opening. Inserting a design puts the design straight into the workspace without opening a new design page. You can also insert a graphic, so for those of you who want to work with graphics, you still can do that in Creator, but you need to open them here, and you work straight with them in the embroidery canvas. I’m not sure if you can open as many formats by inserting a graphic this way as you can with the embroidery canvas in Designer Plus. I think your formats, designs, I’ll have to check on that, but I think your formats are a bit more restricted. Then you’ve got your object properties, your settings, and your other settings. I always get these mixed up, but they’re basically shortcuts to your different settings that you can adjust, and then you can choose metric or imperial or US, it usually says.
Then you’ve got the overview window, so these are basically docker-type buttons here, so you’ve got an overview window, which is in both, which will show you a little picture of where you are if you’re zoomed right in and you lose track of where you are in the design. If you have your overview window open, you can see where your cursor is and what part of the design you’re looking at. Then you’ve got your color film; that’s the same in both. You have not got the pattern stamp, so up here you can see in the Designer Plus version there’s a pattern stamp that doesn’t come with Creator. There’s the morphing tools and the cutwork tools; they are there. Then we’ve got our travel toolbar in, I don’t know whether I’ve moved these or not, but in the version Designer Plus, the travel toolbar is here. It’s just a little on the other side of this zoom tool.
This allows you to travel through the design by color or by object or from one end of the design to the other in one fell swoop, so that’s a very useful tool, and that’s in both versions. Then we’ve got our zoom tool and panning tool, which is the same in Designer Plus as it is in Creator level. On the bottom row, I won’t go through them all individually, but all of these are the same right through to when we start to look at these buttons here. We have got “Show Bitmap” and “Show Vector.” We’ve got the “Show the Applique Fabric.” We’ve got our hoop grid, our design grid. We’ve got “Show Rulers,” and that’s all in the Creator level, but up in the Designer Plus, we’ve got some workspace template things. Well, they come in, we can decide what size. If we’re doing a square project, we can create a workspace the size that we’re working on as a guide to put our design in, and we can do that as a quilt or as just a normal embroidery design, so we’ve got those two workspaces that aren’t in Creator Plus.
Okay, so you can see there’s not much that’s missing from there. Probably the biggest one is the pattern stamp, these quilt workspaces. You could always create a very lightly dense, light density stitch area in the background and just delete it before you save your design to use as a guide, so that’s not as crucial as or you could bring in an image of a rectangle. There are ways around using these tools that came coming Designer Plus, some of them, but there’s no way around using this pattern stamp. You’ve either got it or you’re not; you haven’t, so that’s probably the biggest one in the top menu that’s not available in the Creator.
Okay, let’s go now to the side toolbars, and I need the edit one first. I’ll just, I haven’t got these in order, sorry. I’ll just, whoops, back one. So in the edit toolbox, so these are our toolboxes with all our tools for doing various things with our designs, and if I bring that image back up, and I’m just going to get it closer to the menu so you can see it better. Okay, so if I bring this across and I’ll make it a bit longer so that it gets to about the same size writing-wise. Okay, so in the edit toolbox, we cannot add holes in the Creator level or remove holes in the Creator level. We can add stitch angles and remove stitch angles; that’s in both versions. We don’t have double run in the Creator level, and we don’t have blackwork run in the Creator level.
We do have the new branching tool and the new “Apply Closest Join”; that’s to reapply the closest join if you’ve moved objects around in your design, so they’re both there. There’s no color blending tool in the Creator level, and there’s no fill holes tool. Outlines and offsets are in both versions. The quilting background is not there, and neither is “Create Trapunto Outlines,” so you can’t do the Trapunto work that you can do in the Designer Plus in the Creator level. “Break Apart” is in both versions. “Remove Overlap” is in both versions. “World” is in both versions. The knife and stitch edit are in both versions, and so if you’re big into quilting, that quilting background actually is quite good, so if you’re a big quilting background person, you’d probably want to look at the Designer Plus if you’re doing quite a bit of quilting, and you want to have that option.
The next one is the “Auto-Digitize” toolbox, so here we can see the “Auto-Digitize” toolbox, and there is very little missing from this one, so I’ll just get it to the same size as the others, and it’s basically the same, so this is your Designer Plus level toolbox here. You can see it’s just got a little bit more in the side icons. The first one is “Auto-Digitize,” which is basically the auto-digitizing tool that you use. The same, you can convert an embroidery design to a bitmap picture, and you can convert your vector to embroidery; that’s the same.
The new “Image Preparation” toolbox button is the same in both levels. The “Magic Wand” for auto-digitizing is the same in both levels, and there’s one more “Magic Wand” outline here in the Designer Plus, which is not available in the Creator level, so you can’t do those “Magic Wand” outlines in the Creator level. Then you can “Auto-Digitize Bitmap” outlines; you can convert your bitmaps to artwork, so if you’re in the artwork canvas, that’s the same. Then you can do your photo snap tool, which is a new tool that’s been introduced in the version nine software, and that is the same, so there is only one missing button there, and I think that would be really beneficial.
Now, if you are going to digitize more professionally, and you do use auto-digitizing a lot, you are probably going to want to have all the tools, so again, look at that and think carefully about whether you want all of those tools or not. If you’re not going to be doing the “Magic Wand” outlines, and you’re just going to use the “Magic Wand” to auto-digitize your fill areas, then you probably don’t need that extra button there. Okay, so let’s go on to the next one. I’m going to digitize the toolbox, so the digitizing toolbox is the next one, and there’s a big difference here between the two levels. So the Designer Plus, you can see there are far fewer tools in the Creator level toolbox, so in the Designer Plus, you can do, we’ve got block digitizing, which we don’t have in Creator, so you can’t do your block digitizing.
We have got the close-shape tool, which is the open and close-shape tool. We’ve got the freehand open-shape and freehand close-shape tools. They are not available in Creator. Then we’ve got our ellipse and rectangle tool; that’s there. We’ve got our closed-shape tool. The same is there; you can do an outline in closed shape. You can’t do the outline in a freehand open-shape tool or the freehand closed-shape tool, so you can’t do those as an outline either, so those tools are missing. You can’t do an open-shape outline tool, which is our “Closed Shape” tool up here; you can’t do an open-shape outline tool in the Designer Plus. That’s one of the auto-digitizing outline tools.
Then we’ve got our digitize open-shape, digitize closed-shape. We’ve got our digitize closed-shape outline, which is the digitize open-shape outline; that one there is not in Creator, so you can’t do that one in Creator. Then we’ve got all of our auto-digitizing; we’ve got our manual digitizing tool, so you’ve got your manual closed-shape, you’ve got your manual open-shape; they’re not in Creator. You can’t do an outline with a manual closed shape or a manual open shape, so if you’re doing a lot of manual digitizing, you want to look at the Designer Plus.
You can’t do block digitizing, so that’s another big one, and block digitizing is actually quite useful if you’re doing logos and things like that, and you want to quickly create an area that’s all the same; block digitizing is the easiest way to do that. You can’t do the ripple fill in the Creator level, and you can’t do the three new fills that have come into the Designer Plus level. They are not available in the Creator level. You can’t do the circle shape tool, and there is no form fix; so form fix is a tool that will allow you to make a shape look better, basically, so you don’t have those.
Then when we go down, we do have the gradient fill. We don’t have freehand tools; we’ve got some curved tools. We do have some curved tools, and then you’ve got, so you have got some curved tools that are in Creator, but they are in Designer Plus. We don’t have the monogram tool, which is a new tool that’s come in version nine. Then we’ve got our curved corner tool; that’s in both. We’ve got our ripple fill; we don’t have the freehand circle tool; that’s there.
We don’t have the auto column tool or the form fix tool, and we’ve got our gradient fill; that’s in both, so there’s quite a bit of difference there in the digitizing toolbox, and then I think that’s probably it for that one. We’ll move on to the lettering and monogramming toolbox. The lettering and monogramming toolbox is here, and this is Designer Plus, and then I’ll bring up the Creator version, and you can see that again, there’s a little bit of a difference in the lettering and monogramming.
So Designer Plus has got all the tools, and you can see in the Designer Plus, we’ve got all of these new monogramming fonts that are in the new monogramming font tool. They’re not available in the Creator, so if you want to do those fancy new monograms that have come with Designer Plus, you won’t be able to do that in Creator.
Then, if we move down, we’ve got all of the different alphabet fonts; that’s the same, so they haven’t removed any alphabet fonts from the two versions. That’s good to know. And then, if we come down here, we’ve got, again, some of the outline fonts, the circle fonts. There’s a couple of extra fonts here in the Designer Plus that aren’t available in Creator. Then, if we go down to the next one, we’ve got the monogramming tool; that’s in both, and the monogramming tool is a bit different in Designer Plus.
You can add your own designs around your monograms and your borders, and that’s not available in Creator. Then, if we move down to the last one, we’ve got the last toolbox is our applique toolbox, so if we go to applique, which is just this one here, so we’ve got our applique toolbox. Now, in the applique toolbox, there is quite a bit of difference, so we’ve got our advanced applique, which is not available in Creator, and we’ve got our standard applique.
So, in Creator, you can do some basic applique, but you can’t do the new applique border tool, which is available in Designer Plus, and that’s actually quite a good tool, so that’s worth looking at if you’re going to do a lot of applique. We’ve got our regular applique shapes; they’re available in both, but we’ve got some more options in the Designer Plus for creating the borders of our applique, so we’ve got a few more options there. Then, if we go to the next one, which is cutwork, so in cutwork, you’ve got more options in Designer Plus than you do in Creator. You can’t do some of the more advanced cutwork features in Creator that you can do in Designer Plus, so that’s another one that’s quite limited.
Then, if we go down to the next one, so if we go to stumpwork, that’s another one that is quite limited in Creator, so in the stumpwork tools, you can’t do the stumpwork in Creator that you can do in Designer Plus, and that’s one of those tools that, you know, if you’re going to do that sort of 3D embroidery where you’re putting wire in to make the embroidery pieces stand up, you’re going to need the Designer Plus, so that’s another one to consider if you’re going to do quite a bit of that stumpwork. Then, the mirror merge tool is identical in both versions, so that hasn’t changed.
So you can do all your creative combinations with the mirror merge in both versions. And the last one is our layout toolbox, and if we bring that up, and the layout toolbox is very different, so in the layout toolbox, we’ve got a few more options in the Designer Plus, so if we come down here, we’ve got our layout toolbox, and there we go. So in the layout toolbox, you can see the layout tool is quite a bit different. We’ve got some options in Designer Plus that aren’t in Creator, so you can define your work area, so you can actually create a workspace area for your project. If you’re doing quilting, it’s quite handy to fit your design to the quilt block, so you can’t do that in Creator.
You can do that in Designer Plus. You can do all of your alignments in Creator that you can do in Designer Plus, so you can align everything in both levels, but you can’t create those extra areas to work in. Now, the arrange toolbar is almost identical in both, so there hasn’t been much change there. The only difference there is that we’ve got these quilting tools in Designer Plus that aren’t available in Creator.
So if we go down a bit further, then we’ve got the multi-hooping toolbar, and that’s quite a big difference. There is no multi-hooping in Creator, so if you want to do multi-hooping, you’re going to need to use Designer Plus. There is no multi-hooping in Creator at all, and multi-hooping, if you’re doing larger designs than your hoop, that’s crucial. You’re going to need to use Designer Plus to get that done, so that’s quite a big one. And finally, we’ve got our bitmap artwork toolbox.
So, in the bitmap artwork toolbox, we have got some tools that we can’t use in Creator that are available in Designer Plus, so, again, the auto-digitizing toolbox is very similar in both versions, so if you’re doing auto-digitizing, you probably don’t need the Designer Plus. You can do auto-digitizing in both. And the final one is the output toolbox, and the output toolbox is different as well. We’ve got a few more options in Designer Plus that aren’t available in Creator, so, in the output toolbox, we’ve got the file and batch conversion tools that aren’t in Creator, so if you need to do batch conversions, you’re going to need to use Designer Plus, and the “Send to Your Machine” is in both.
If you have any other requests, please let me know!