Proxmox VE: Cluster Network 구성하기
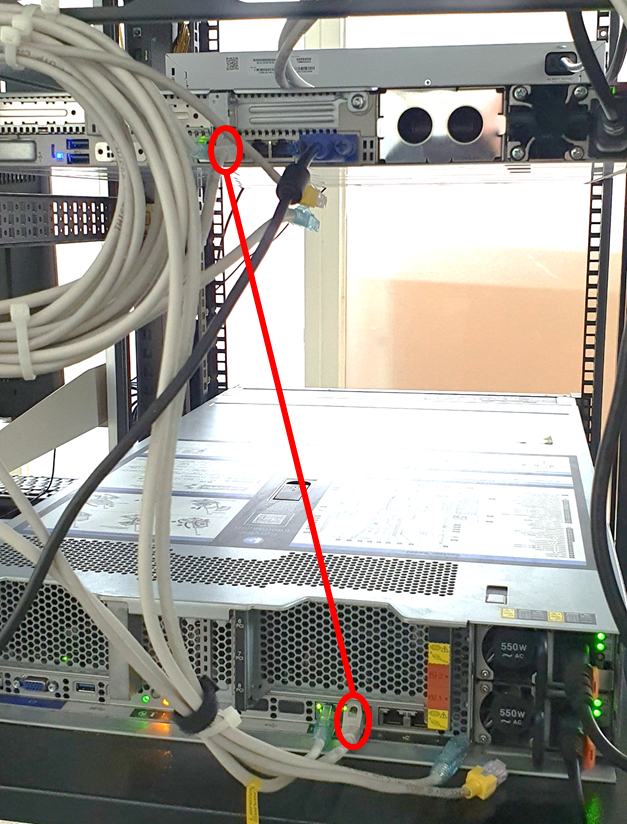
Cluster로 구성된 node간에 원활한 통신을 위해 corosync 전용 Communication Network을 구성해 보도록 하겠습니다. 저는 앞서서 2개의 node를 Cluster로 구성하였기 때문에 별도의 스위치없이 바로 Lan선을 연결하여 아래와 같이 구성하겠습니다.
- node1용 Communication Network Interface IP : 192.168.10.101/24(NIC: eno02)
- node2용 Communication Network Interface IP : 192.168.10.102/24(NIC: eno02)
- node1의 eno02 NIC와 node2의 eno02 NIC를 LAN선으로 바로 연결합니다.
- node1에 원격 접속하여
/etc/network/interfaces 파일을 아래와 같이 편집합니다.
변경 전 변경 후 iface eno2 inet manual
auto eno2 iface eno2 inet static address 192.168.10.101 netmask 255.255.255.0 - node2에 원격 접속하여
/etc/network/interfaces 파일을 아래와 같이 편집합니다.
변경 전 변경 후 iface eno2 inet manual
auto eno2 iface eno2 inet static address 192.168.10.102 netmask 255.255.255.0 - 아래의 명령어로 각 노드에서 네트워크 설정을 적용합니다.
systemctl restart networking - node1에서
ping 192.168.10.102명령어를 실행해서 node2와 정상적으로 통신이 이루어지는지 확인합니다. - cluster 전용 네트워크를 사용하기 위해 node1에서 corosync 데몬의 환경설정 파일을 아래와 같이 변경합니다.
변경 전 변경 후 logging { debug: off to_syslog: yes } nodelist { node { name: node1 nodeid: 1 quorum_votes: 1 ring0_addr: xxx.xxx.xxx.141 } node { name: node2 nodeid: 2 quorum_votes: 1 ring0_addr: xxx.xxx.xxx.142 } } quorum { provider: corosync_votequorum } totem { cluster_name: cluster config_version: 2 interface { linknumber: 0 } ip_version: ipv4-6 link_mode: passive secauth: on version: 2 }logging { debug: off to_syslog: yes } nodelist { node { name: node1 nodeid: 1 quorum_votes: 1 ring0_addr: 192.168.10.101 # Cluster Network IP } node { name: node2 nodeid: 2 quorum_votes: 1 ring0_addr: 192.168.10.102 # Clustter Network IP } } quorum { provider: corosync_votequorum } totem { cluster_name: cluster config_version: 2 interface { linknumber: 1 # NIC No. } ip_version: ipv4-6 link_mode: passive secauth: on version: 2 } - 아래 명령어를 사용하여 corosync 데몬을 재시작합니다.
systemctl restart corosync - 아래와 같이 node2에서 구성한 LVM disk(wmdata)가 표시되지 않는 경우에는, node1에서
/etc/pve/storage.cfg 파일을 수정해야 합니다.
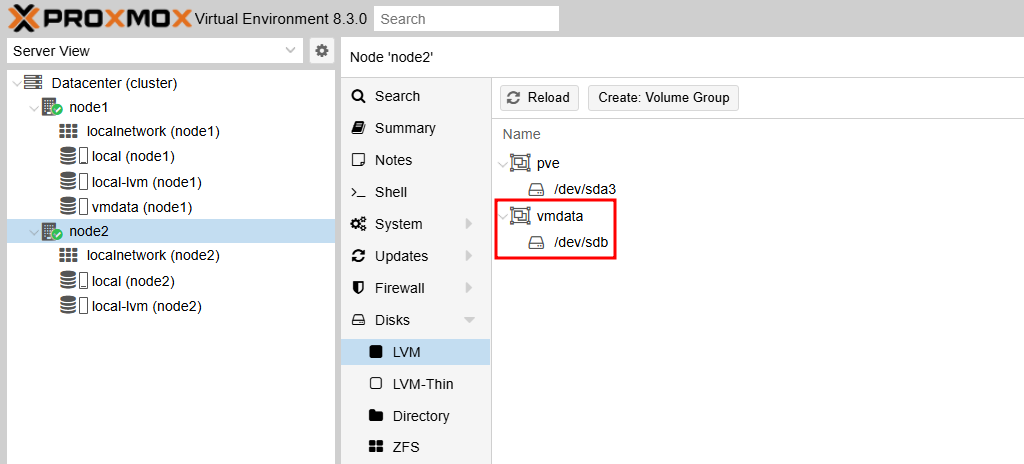
변경 전 변경 후 dir: local path /var/lib/vz content iso,vztmpl,backup lvmthin: local-lvm thinpool data vgname pve content rootdir,images lvm: vmdata vgname vmdata content images,rootdir nodes node1 shared 0dir: local path /var/lib/vz content iso,vztmpl,backup lvmthin: local-lvm thinpool data vgname pve content rootdir,images lvm: vmdata vgname vmdata content images,rootdir nodes node1 node2 shared 0 /etc/pve/storage.cfg 파일을 저장하면 아래 이미지처럼 node2의 LVM Disk(vmdata)가 웹 관리자 화면에 표시됩니다.